High Frequency Polling
Overview In this lab we will learn how we can get more granular data from the network by monitoring specific objects at a higher frequency
High Frequency Poller
Log into the NMS
Go to Devices -> Device Manager
Click on the ‘spanner’ icon of YOURDEVICE
Click on ‘High Frequency Poller’
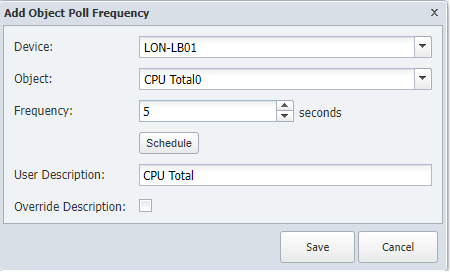
Click ‘Add Object Poll Frequency’
- a. Object: CPU Total0
- b. Frequency: 5 seconds
Save
Review
This action should take immediate effect, so the easiest way to confirm this is by clicking on the name of the object.
![]()
This will bring us to a new page with the indicators monitored on that object, to see the difference between 1 minute polling and 5 seconds polling, click on the first widget (CPU Load) and that action will open a new window.

On that new window, on the only widget available click on the + symbol to extend the widget and then click on the gear -> Change Timespan -> Past 2 hours. This way we will have a better view of the data collected.
